TLDR
The safest answer to how to remove stickers from wood is to identify the surface first, lift the sticker with a nonmetal edge, and peel slowly without pulling upward. If adhesive remains on finished wood, test a finish-compatible remover in a hidden spot and follow its label exactly. Do not soak the surface or assume that heat, oil, alcohol, acetone, or another household remedy is safe for every wood finish.
Finished furniture can often tolerate careful cleaning that would stain or swell unfinished wood. Veneer, painted wood, laminate, antiques, damaged finishes, and engineered boards introduce additional risks. When the material or finish is uncertain, begin with dry mechanical removal and stop before experimenting with stronger methods.
Check the wood surface before you begin
A sticker may be attached to solid wood, thin veneer, painted cabinetry, laminate made to resemble wood, or an engineered panel such as MDF or particleboard. The visible surface may also have wax, oil, lacquer, varnish, polyurethane, paint, or no finish at all. Those differences determine how the surface responds to moisture, friction, heat, and solvents.
Wood finishes contribute appearance, protection, and cleanability, which is why a sealed tabletop and an unfinished wooden box should not be treated as interchangeable surfaces. The US Forest Service provides a useful overview of how wood finishing affects appearance and protection.
| Surface condition | Practical approach | Main risk |
|---|---|---|
| Intact finished or sealed wood | Lift the sticker dry, then test any labeled cleaner in a hidden area | Dulling, softening, or discoloring the finish |
| Unfinished or raw wood | Favor dry removal and avoid routine use of liquid adhesive remover | Liquid or dissolved adhesive soaking into the grain |
| Painted wood | Treat the paint as the finish and test before cleaning | Paint softening, lifting, or changing sheen |
| Veneer or engineered board | Use minimal pressure and almost no moisture | Edge lifting, swelling, or exposing the core |
| Antique, valuable, or damaged surface | Stop early and consult a furniture conservator or restorer | Permanent loss of the original finish |
Look at an inconspicuous edge or underside if you cannot tell what you have. Raw wood commonly shows open grain and absorbs moisture readily, while finished wood often has a more uniform sheen and smoother feel. These clues are not definitive. If the surface is valuable or the finish is already flaking, cloudy, sticky, cracked, or worn through, treat it as high risk.
How to remove stickers from wood step by step
1. Lift one edge without scratching
Try a fingernail first. If that does not work, use a clean, nonmetal, non-abrasive edge that cannot gouge the surface. Work gently at a corner rather than scraping across the wood. Avoid knives, razor blades, metal putty knives, and abrasive pads; one slip can cut through a coating or leave scratches that are more visible than the sticker.
2. Peel low and slowly
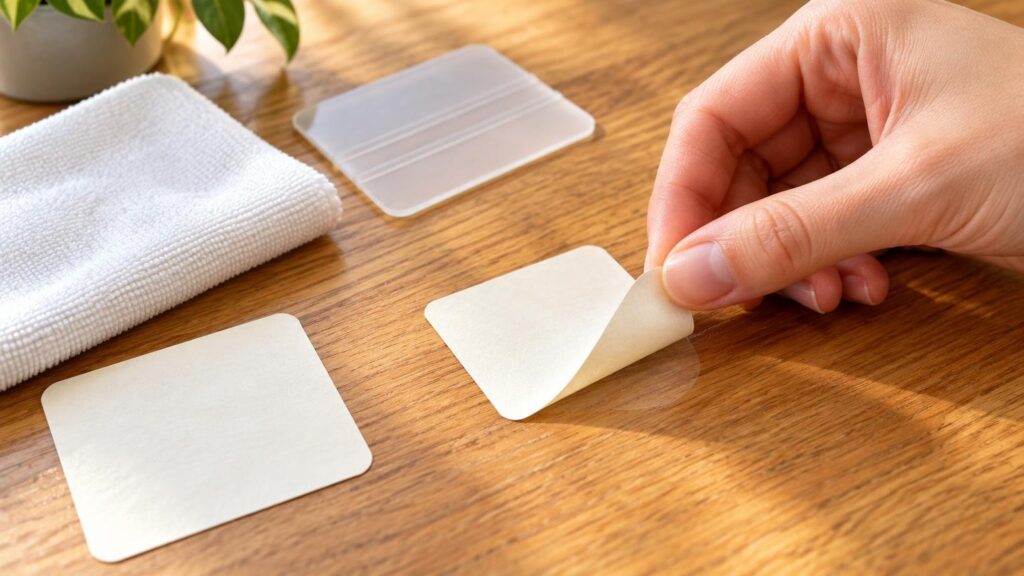
Pull the sticker back over itself, keeping the peel angle low and close to the surface. Use steady, light pressure. Pulling sharply upward concentrates force at the edge and can lift weak paint, loose veneer, or a deteriorated clear coat.
If the sticker tears, begin again from another accessible edge. Removing it in several small pieces is safer than digging aggressively at the surface. Old paper price labels may separate into layers; take off the dry face material first and address the adhesive as a separate job.
3. Inspect before using a cleaner
Once the sticker is gone, pause. A slightly tacky film needs less intervention than a thick adhesive patch. Also check whether color or finish came away with the sticker. If the area is already dull, discolored, sticky, or bare, additional rubbing or solvent may enlarge the damage.
Removing sticky residue from finished wood
For an intact finished surface, choose an adhesive-removal product whose label permits the intended material or use. Do not rely only on the general phrase “safe on wood”; wood can mean a durable factory finish, raw timber, painted furniture, or a fragile antique coating.
- Read the entire product label, including surface exclusions and safety directions.
- Test a very small amount on a hidden part of the same finished surface.
- Allow the test area to dry fully, then check for a change in color, gloss, hardness, or texture.
- If the test remains unchanged, apply only as directed and keep the treatment confined to the residue.
- Use a soft, non-abrasive cloth and light pressure rather than vigorous scrubbing.
- Clean the treated area afterward if the label requires it, then remove remaining moisture promptly without soaking the wood.
Goo Gone Sticker Lifter, for example, directs users to pre-test, clean the area after use, and avoid using that particular product on unfinished wood. Its directions for finished wood apply to that product; they do not prove that every adhesive remover is compatible with every finish.
More liquid is not necessarily more effective. Excess cleaner can migrate through worn spots, seams, veneer edges, joints, or exposed end grain. Apply the smallest useful amount according to the label rather than pouring or saturating the area.
What to do with unfinished wood
Unfinished wood requires a more conservative approach because liquid and softened adhesive can enter the pores instead of remaining on a cleanable coating. A remover may turn a surface deposit into a darker, wider stain. Oil-based household remedies can also alter how the wood later accepts stain or finish.
Begin with dry, gentle lifting only. Do not use Goo Gone Sticker Lifter on unfinished wood because its manufacturer expressly excludes that surface. If residue remains, the appropriate next step depends on the wood species, intended finish, value of the object, and depth of contamination. A woodworker or furniture restorer can advise whether controlled sanding or another treatment is appropriate; sanding should not be a casual first step because it changes the surface and can cut through veneer.
Food-contact items such as cutting boards also need material-specific cleaning and refinishing guidance. Do not treat them like ordinary furniture or apply a general adhesive remover unless its directions explicitly allow that use.
Methods to avoid unless the finish manufacturer approves them
- Metal blades and aggressive scraping, which can cut paint, veneer, or clear finish.
- Abrasive pads or powders, which can create a permanently dull patch.
- Soaking with water or cleaner, especially near joints, exposed edges, cracks, or engineered board.
- Acetone, rubbing alcohol, vinegar, oils, or multipurpose solvents presented as universally safe. Different coatings respond differently.
- Uncontrolled heat from a hair dryer or heat gun. There is no single safe temperature or exposure time for every coating, adhesive, veneer, or painted surface.
- Combining cleaning products. Follow one product’s directions rather than improvising a chemical mixture.
Heat may soften some adhesives, but it can also soften a coating, affect paint, or concentrate stress in veneer. Without documentation for the particular surface, gentle dry peeling is the lower-risk starting point.
Special cases: cabinets, floors, and old labels
Painted cabinets
Treat the paint film as the surface you must protect. Test behind a door or in another inconspicuous location, and stop if the cloth picks up paint or the sheen changes. Cabinet coatings vary widely, so a method that works on one kitchen may damage another.
Wood floors
Check the flooring manufacturer’s care instructions before using an adhesive remover. Floor finishes, factory coatings, wax systems, and maintenance products are not interchangeable. Avoid letting liquid reach plank seams, where it may affect the wood or underlying material.
Old price labels
An aged label may be brittle while its adhesive remains tenacious. Remove loose paper in stages and resist the urge to scrape harder as pieces become smaller. After the paper is gone, reassess the finish before treating the residue.
Use adhesive removers safely
Household chemical products should be used according to their labels. Provide ventilation as directed, observe warnings about vapors and skin or eye contact, and keep potentially flammable products away from flames, sparks, and other ignition sources. The US Consumer Product Safety Commission’s indoor air quality guidance discusses ventilation and precautions for household products that release organic chemicals. Keep cleaners away from children and pets, and store them in their original containers.
When to stop and call a professional
Stop if the finish becomes soft, gummy, cloudy, lighter, darker, or noticeably dull. Also stop if paint lifts, veneer begins separating, color transfers to the cloth, or bare wood appears. Adding another solvent usually makes an uncertain reaction harder to correct.
Professional help is sensible for antiques, valuable furniture, sentimental objects, unknown historic finishes, marquetry, thin veneer, and surfaces with existing water or chemical damage. A conservator or furniture restorer can identify whether the problem is remaining adhesive, displaced finish, or actual coating loss.
Frequently asked questions
Can I use Goo Gone on wood furniture?
The manufacturer’s Sticker Lifter directions permit product-specific use on finished wood with pre-testing and subsequent cleaning, but exclude unfinished wood. Follow the current label for the exact product in hand rather than extending those directions to every Goo Gone formula or wood finish.
What can lift a sticker without scratching wood?
Start with a fingernail or a clean nonmetal, non-abrasive edge. Peel close to the surface with light pressure. Avoid razor blades and metal scrapers, even when the sticker seems too stubborn for a gentler tool.
Can I use rubbing alcohol, acetone, or a hair dryer?
None is universally safe for wood. Alcohol and acetone can affect certain coatings, while heat can soften or discolor a finish and may aggravate veneer problems. Use a method only when the finish or furniture manufacturer approves it, and test as directed.
What if the finish looks cloudy or dull afterward?
Stop cleaning, blot away any remaining product if its directions call for that, and let the area dry without adding heat. Do not immediately apply oil, polish, or another solvent to hide the mark. If the appearance does not recover, consult a furniture repair or finishing professional.
Choose the least aggressive method that works
Successful sticker removal is less about finding the strongest solvent and more about protecting the surface beneath the adhesive. Identify the material, peel slowly, separate label removal from residue cleanup, and test any compatible product before treating a visible area. Raw wood, damaged coatings, antiques, and unknown finishes deserve a stop-early approach.
If the old piece is being replaced, consider whether the next item belongs on the wood at all. A removable display surface or separate backing panel may prevent another cleanup job, while properly specified custom stickers can be reserved for compatible surfaces. Whatever the next application, checking surface suitability before placement is easier than repairing a damaged finish later.