
TLDR
Die-cut stickers explained when to use them: choose this format when the sticker’s outer shape is an important part of the design and you want separate, ready-to-hand-out pieces. A printer follows a contour around the artwork, cutting through the printable material and its backing. Use kiss-cut sheets when several designs should remain together or when a larger backing card improves handling. Use a standard circle, square, oval, or rectangle when a custom outline adds complexity without improving the design.
The cut shape is only one production decision. A successful die-cut sticker also needs an intentional contour, sufficient bleed, protected text and details, and a material and finish suited to its final environment. Exact file settings and cutting capabilities vary, so obtain the printer’s template or artwork requirements before finalizing the file.
What is a die-cut sticker?
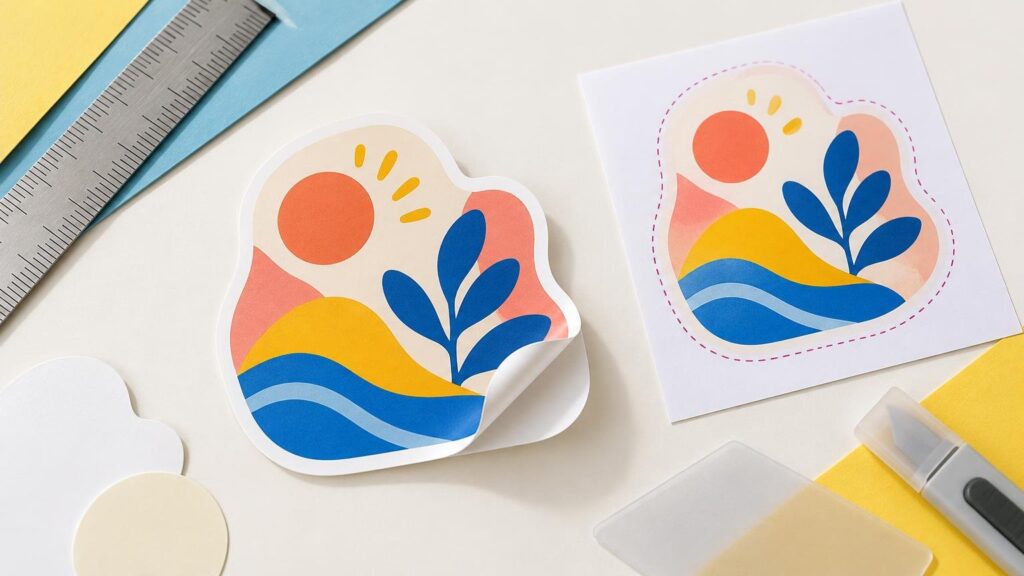
A die-cut sticker is trimmed into a custom outer shape rather than being confined to a standard geometric format. A fox illustration might follow the animal’s silhouette, for example, while a bakery sticker might trace the outline of a loaf and its lettering. The backing is normally cut to the same general outer contour, leaving an individual sticker rather than a design sitting on a larger rectangular carrier.
The name describes the result more reliably than the machinery. Some jobs may use a physical die, while others are contour-cut with digital equipment. Do not assume that every supplier uses the same cutting process merely because the product is called die-cut.
This format works especially well for logos, mascots, illustrations, event handouts, mailer inserts, merchandise packs, collectible artwork, and branded giveaways. The custom silhouette makes the physical piece feel integrated with the design instead of looking like artwork placed inside an arbitrary rectangle.
How die-cut sticker production works
Production begins with the intended finished shape. The printer prepares or receives a technical vector path showing where the sticker should be cut. Artwork extends beyond that path where color is meant to reach the edge, while important content stays comfortably inside it.
- Set the intended physical size before judging line weight, text size, or image quality.
- Choose the outer contour and decide whether the design will have a visible border or print to the edge.
- Add bleed outside the finished cut line wherever artwork should reach the edge.
- Keep lettering, logos, faces, and other critical details away from the contour.
- Supply or approve the technical cut path according to the printer’s workflow.
- Review a proof for size, contour placement, borders, content safety, and unexpected background elements.
- The job is printed, finished if applicable, contour-cut, and separated into its final supply format.
Print-and-cut equipment must relate the printed image to the intended contour. Small variations can occur during production, which is why bleed and safe placement matter. A proof can reveal a poorly positioned cut path, but it cannot rescue artwork that lacks usable image area beyond the edge.
Die-cut vs. kiss-cut stickers
| Format | Physical presentation | Best suited to |
|---|---|---|
| Die-cut | Custom-shaped individual piece, typically with backing cut around the design | Giveaways, merch packs, inserts, logos, mascots, and collectible designs |
| Kiss-cut | Sticker face is cut while a larger backing or carrier remains | Sticker sheets, grouped designs, easier peeling, and presentation on a backing card |
| Standard shape | Circle, square, rectangle, oval, or another preset shape | Simple artwork, efficient layouts, uniform branding, and designs already built around that shape |
| Roll or sheet labels | Repeated labels arranged for storage or application | Packaging workflows and repeated application to products or containers |
The important difference is not that one format automatically prints better. It is how the pieces are handled and presented. A die-cut sticker is convenient to place into an order or hand to someone at an event. A kiss-cut design can be easier to peel because the surrounding carrier provides an edge to hold. A sheet keeps related designs together. For a broader comparison, see die-cut, kiss-cut, and sticker-sheet formats.
When should you use a custom contour?
Choose die-cutting when the silhouette contributes meaning. A rocket with fins, a state outline, a character’s profile, or a wordmark with a deliberate border can all benefit. The format is also useful when individual distribution matters: one sticker per shipment, attendee, customer, or merchandise bundle.
A standard shape is often more practical when the design is already circular or rectangular. It can also prevent the contour from competing with small text. Likewise, routine product application may be better served by labels supplied in rolls or sheets, depending on the container, quantity, and application method.
If the project is ready for supplier-specific options, you can compare available custom sticker printing choices after deciding the required shape, material, finish, quantity, and use environment. Verify the provider’s current artwork and product specifications before building the final production file.
File setup: cut line, bleed, and safe area
The cut path defines the finished shape
A cut path, contour path, or cut line is a technical vector path representing the intended edge. It may appear as a conspicuous colored stroke in the working file even though that stroke is not supposed to print. Whether customers must create this path themselves depends on the supplier.
Conventions are workflow-specific. Roland VersaWorks, for example, documents a vector cutting-line workflow using the case-sensitive spot-color name CutContour. That is a requirement for that system, not a universal naming rule for every printer or machine. Roland’s cutting documentation explains its particular setup.
Bleed is expendable artwork, not a visible border
Bleed is artwork extending beyond the final edge so minor cutting variation does not expose an unintended unprinted sliver. Adobe describes bleed as content outside the finished trim area and advises using the amount required by the print provider. Its educational material uses 0.125 inch, or 3 mm, as a common example while noting that a provider may require more. That example should not replace the specification for the actual sticker job. Adobe’s guide to setting print bleed provides a useful visual explanation.
A white border is different. It is an intentional, visible design element inside the finished sticker. Bleed sits outside the cut and is expected to be removed. A sticker can therefore have full-bleed artwork with no white outline, or it can have a deliberate white frame plus additional bleed beyond the contour. See white-border and full-bleed sticker design for a closer comparison.
The safe area protects important content
The safe area is the region inside the cut where critical content should remain. There is no universal safe-area value suitable for every supplier, size, or contour. As a practical rule, do not let small text, facial features, thin outlines, or essential logo elements crowd the cut line. More visual breathing room makes minor production variation less noticeable.
Can you send a PNG?
A PNG can preserve transparency and may be usable as the image source, but acceptance does not automatically make it ideal. Its effective resolution depends on its pixel dimensions at the final printed size, and enlarging a small raster image can soften edges. It also may not contain the editable vector contour a production workflow needs.
A clean vector file is generally easier to scale and use for a precise contour, particularly for logos and lettering. Raster illustrations can still print well when they contain enough image information at final size. Ask the printer which formats it accepts, whether it creates cut paths, and how it wants transparency, linked images, fonts, and bleed handled. The custom sticker artwork preparation guide covers the broader prepress checks.
Keep the contour practical
A contour can follow a design without tracing every hair, leaf, or letterform. Extremely tiny points, narrow channels, tight inside corners, and fragile projections may complicate cutting, peeling, or handling. Simplifying the outline often produces a cleaner physical object while preserving the character of the artwork.
Consider the sticker at its final size, not while zoomed far into the design. A narrow appendage that looks substantial on a large monitor may become delicate when the complete sticker is only a few inches wide. If an intricate silhouette is essential, ask the supplier to review it before placing a large order rather than relying on an assumed minimum tolerance.
Material and finish are separate decisions
Die-cutting does not make a sticker waterproof, weatherproof, outdoor-rated, or especially durable. Those properties depend on the printable material, adhesive, ink system, protective layer, surface, exposure, and supplier’s tested product specification. Tell the printer whether the sticker is intended for indoor packaging, a laptop, a bottle, a vehicle, or another environment.
Matte and gloss mainly change appearance and surface character. Gloss can emphasize color and shine, while matte tends to reduce glare and create a more subdued look. Either may be appropriate; the choice does not determine the contour. Specialty substrates can also change color and opacity, so confirm whether white ink or another production treatment is involved rather than assuming screen colors will transfer directly.
What to confirm before ordering
- Finished width and height, measured at the sticker’s widest points
- Quantity and whether the pieces will be supplied individually
- Indoor, outdoor, refrigerated, wet, or other expected use conditions
- Preferred material, adhesive behavior, and matte or gloss finish
- Visible white border, colored border, or full-bleed treatment
- Whether you or the printer will create the cut path
- Required bleed, safe area, file type, color settings, and image resolution
- A proof showing the finished size and intended contour
- Any risky narrow gaps, holes, sharp points, or detailed inside corners
- Production and delivery timing confirmed for the specific order
The practical decision
Use a die-cut sticker when a custom silhouette strengthens the artwork and individual pieces suit the way you will distribute them. Choose kiss-cut sheets when designs belong together or need a larger carrier, standard shapes when the artwork does not benefit from a special contour, and label formats when repeated product application is the main task.
Before ordering, settle the finished size, visible-border choice, contour complexity, material, and finish. Then obtain the supplier’s current file requirements and build the bleed and cut path around those instructions. That sequence prevents a creative outline from becoming a production problem.