TLDR: To keep a sticker on a water bottle, start with a suitable film-based sticker and a smooth, clean, completely dry surface. Apply the sticker with firm pressure from the center outward, press its edges carefully, and protect those edges from abrasive washing. Smooth metal, glass, and some smooth plastics are generally easier than textured, powder-coated, rubberized, or silicone surfaces. No application method can make an incompatible sticker and bottle finish behave like a permanent bond.
If you are wondering how to keep stickers on water bottle surfaces, the key is to diagnose four variables: the sticker material, the bottle finish, the initial application, and the bottle’s wash-and-wear routine. Peeling often begins because the adhesive never established complete contact—not simply because the printed surface got wet.
Pressure-sensitive adhesive works best when it can make close contact with the surface. Contamination, moisture, and texture reduce that contact, while firm application pressure helps establish it. The 3M surface-preparation guidance explains these fundamentals for pressure-sensitive bonding.
How to keep stickers on a water bottle in five steps
1. Check the bottle surface
Run a finger over the intended application area. A smooth, rigid surface gives the adhesive a better opportunity to contact the bottle evenly. A pebbled texture, powder coating, soft-touch coating, rubberized finish, or silicone sleeve leaves microscopic or visible gaps beneath the adhesive. Printing Ray’s application guidance likewise recommends clean, smooth surfaces and identifies textured plastic, powder coating, rubber, silicone, waxed surfaces, and fresh paint as surfaces that require caution.
If you cannot identify the finish, test a small, replaceable sticker in an inconspicuous spot before applying a favorite design. Do not assume that every stainless-steel bottle has the same exterior: the sticker may actually be touching paint, powder coating, or another applied finish rather than bare metal.
2. Clean without damaging the finish
Remove oil, dust, soap residue, and dried drink splashes. Use the bottle manufacturer’s recommended cleaning method, particularly on painted or coated exteriors. A soft lint-free cloth is safer than an abrasive pad.
Rubbing alcohol is sometimes used for surface preparation, but it should not be treated as universally safe. It may affect certain paints, printed decorations, soft-touch finishes, or coatings. Check the bottle maker’s care instructions and test any cleaner discreetly. If mild soap and water are permitted, rinse away the soap thoroughly so it does not leave a film.
3. Let the bottle dry completely
Water trapped around texture, seams, or old adhesive residue can interfere with contact. After cleaning, let the exterior become fully dry. Avoid applying a sticker to a cold bottle covered in condensation. Bring it to a comfortable indoor temperature and wait until no moisture remains.
4. Apply from the center outward
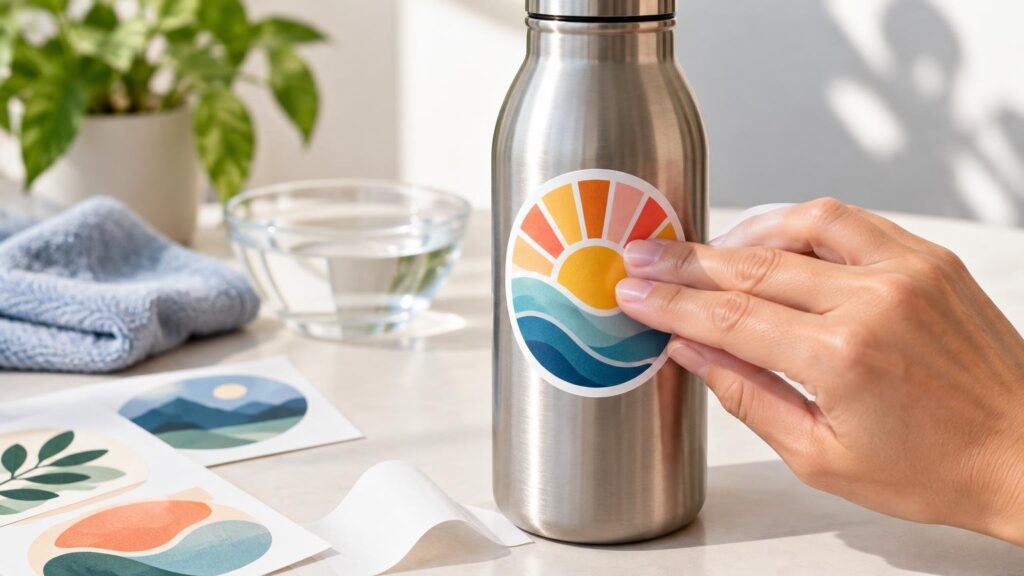
Position the sticker before exposing the full adhesive when its construction allows. Once placed, press from the center toward the edges to push out air and reduce wrinkles. Use a clean finger or a soft tool that will not scratch the printed face. Printing Ray recommends this center-out method in its sticker application guidance.
Firm, even pressure matters because a pressure-sensitive adhesive must wet out, or spread into close contact with, the application surface. Do not rely on a light tap around the perimeter. Give the entire printed area deliberate pressure, paying special attention to narrow points and corners.
5. Re-press the edges and allow the bond to develop
Inspect the perimeter under good light. Press down any edge that is not lying flat, but avoid repeatedly lifting and repositioning the sticker. Adhesive bond development can continue after application, although the appropriate wait time varies by adhesive, surface, and manufacturer. Follow the sticker supplier’s instructions before washing or exposing the bottle to heavy moisture rather than relying on a universal number of hours.
Why water-bottle stickers peel
A peeling corner is the visible symptom, but the underlying cause may differ. Common causes include:
- Skin oil, lotion, dust, soap, or cleaner residue beneath the adhesive
- Condensation or wash water present during application
- A rough or low-contact surface that prevents the adhesive from conforming
- A sharp corner or thin design element that catches on hands, bags, cup holders, or cleaning cloths
- Insufficient pressure during the initial application
- A paper sticker absorbing water through an unprotected face or edge
- Heat, detergent, abrasion, and water jets during repeated washing
- Removing and repositioning a sticker after its adhesive has picked up dirt or lost contact
Surface roughness is especially important. Adhesive may touch only the high points of a textured finish, leaving less bonded area than it would have on smooth glass or metal. Some low-surface-energy materials also resist adhesive wetting, making reliable attachment harder even when they look relatively smooth.
For a heavily textured bottle, application technique alone may not solve the problem. Consult a supplier about an adhesive designed for the specific finish, or review the practical considerations for ordering stickers for textured surfaces.
Choose the sticker construction for moisture and handling
Paper and film-based stickers do not react to water in the same way. Unprotected paper can soften, wrinkle, stain, or split after moisture reaches the face or cut edge. A film-based sticker, commonly described as vinyl or another plastic film, is generally a more practical starting point for a frequently handled bottle.
Material names alone do not guarantee durability. Adhesive type, ink, protective laminate, bottle surface, application quality, washing, sunlight, and abrasion all contribute to the result. Printing Ray specifically distinguishes a generic material label from the complete construction and exposure conditions that determine sticker life. For a fuller material comparison, see vinyl vs BOPP vs paper stickers.
Lamination can protect printed ink from scuffing and direct moisture, but it does not correct an unsuitable adhesive or poor surface contact. It also cannot stop water from reaching an edge that has already lifted. Rounded corners and compact shapes may be less prone to catching than sharp points, although final performance still depends on the complete sticker and bottle combination.
Which bottle surfaces work best?
| Bottle surface | Likely application difficulty | Practical approach |
|---|---|---|
| Smooth bare metal | Generally favorable | Clean safely, dry fully, and apply with firm, even pressure. |
| Smooth glass | Generally favorable | Remove oil and residue, then protect the sticker edges during washing. |
| Smooth plastic | Varies by plastic | Test adhesion first because plastics differ in surface properties. |
| Painted metal | Finish-dependent | Follow the bottle maker’s cleaning guidance and test discreetly. |
| Powder-coated or textured finish | More difficult | Use a test sticker and ask whether the adhesive is intended for texture. |
| Rubberized or soft-touch finish | More difficult | Avoid assuming compatibility; coatings may resist adhesion or be sensitive to cleaners. |
| Silicone sleeve | Usually difficult | Place the sticker on a compatible rigid bottle area instead, if available. |
On a curved bottle, sticker size also matters. A large, stiff sticker may resist conforming to a tight curve, while narrow points can lift under stress. A smaller shape with rounded corners is often easier to seat smoothly. If you are planning artwork rather than rescuing an existing sticker, use a sticker size guide for water bottles before ordering.
Wash the bottle without attacking the sticker edges
Follow the bottle manufacturer’s care instructions first. Bottle models and generations can have different cleaning requirements; Hydro Flask, for example, publishes model-specific dishwasher guidance rather than one rule for every bottle. A dishwasher-safe bottle does not automatically make a third-party sticker dishwasher-safe.
For the best chance of preserving the decoration, use gentle exterior cleaning when permitted. Avoid abrasive pads, forceful scraping, prolonged soaking, and directing concentrated scrubbing at the sticker perimeter. Patting the exterior dry is gentler than repeatedly dragging a rough towel across raised edges.
Claims such as “waterproof” and “dishwasher-safe” are not interchangeable. Water resistance may describe the face material or print, while dishwasher survival also depends on the adhesive, edge sealing, heat, detergent, spray force, cycle length, bottle finish, and repeated exposure. Confirm the supplier’s care guidance for the finished sticker—not merely the base film.
Troubleshoot common sticker failures
One corner is beginning to lift
Make sure the area is dry, then press the corner down firmly. If the exposed adhesive has collected lint, oil, or grit, it may not recover. Avoid adding household glue unless both the bottle manufacturer and adhesive maker confirm compatibility; a glue that holds the corner may stain the finish or complicate later removal.
The whole sticker peels off quickly
Rapid failure usually points to contamination, moisture, inadequate application pressure, or poor compatibility with the exterior finish. Clean a different test area using an approved method and try a fresh sticker. Reusing the failed sticker is unlikely to provide a fair test because its adhesive may already be contaminated.
Bubbles or wrinkles appear
Small bubbles can result from uneven placement or pressure. Press outward gently if the sticker remains freshly applied and flexible. Do not repeatedly peel it back, as repositioning can introduce dirt and stretch or crease the material. Wrinkles created by forcing a flat, stiff sticker around a strong curve may indicate that a smaller design would fit better.
The image scratches or fades but the sticker remains attached
This is a face-durability problem rather than an adhesion problem. A suitable laminate or protective coating may help on a future order, provided it is part of a sticker construction intended for the expected environment. Printing Ray notes that its vinyl stickers are positioned as an all-purpose option for bottles and gear, but that product-specific guidance should not be generalized to every sticker sold as vinyl.
A paper sticker becomes soft or wrinkled
Replacement is usually more realistic than repair once paper has absorbed water. Choose a film-based construction intended for moisture and frequent handling, and verify whether the printed face, adhesive, and any laminate are suitable for your wash routine.
Should you seal stickers on a water bottle?
Clear tape, spray coatings, and resin are not universal fixes. A sealer may react with the bottle finish, change its appearance, trap moisture, create a raised edge, or make later removal difficult. Some products also have use restrictions that matter around drinkware. Do not coat drinking rims, threads, lids, or food-contact areas, and use a sealant only when its manufacturer confirms compatibility with the bottle material, sticker, and intended use.
A correctly matched sticker applied to a compatible surface is a cleaner solution than trying to compensate with an unverified coating. If sealing is essential for a craft project, test the complete material stack on a separate sample first.
When replacement is the better answer
Replace the sticker when the paper has suffered water damage, the adhesive has collected dirt, several edges are lifting, or the sticker was removed after its first application. Replacement is also sensible when the original construction was never intended for moisture or when a large design cannot conform to the bottle’s curve.
When ordering custom stickers for water bottles, tell the supplier what the bottle exterior is made from, whether it is smooth or textured, how the bottle is washed, and how much abrasion it receives. Ask about the complete construction: face material, adhesive, ink protection, laminate, and care limits. That information is more useful than requesting “vinyl” alone.
The practical takeaway
The most reliable approach is to use a moisture-tolerant film sticker on a smooth, compatible bottle surface; clean and dry that surface safely; apply firm center-out pressure; and wash without attacking the edges. If stickers repeatedly fail despite careful application, stop treating it as a pressure problem. The bottle finish or adhesive is probably the limiting factor, and a fresh sticker designed for that surface is more likely to work than glue, tape, or an improvised sealer.