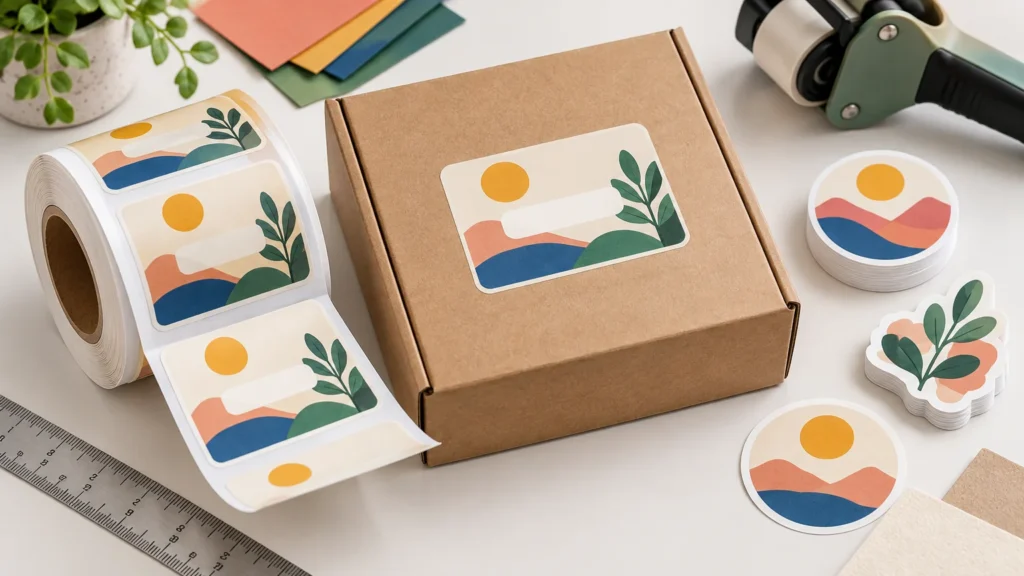
TLDR: Choose die cut roll labels when the adhesive graphic is part of a repeat packaging process, especially when labels will be dispensed quickly or applied by a machine. Choose individually cut stickers when each piece will be handed out, packed as a promotional extra, sold separately, or applied only occasionally. The deciding factor is usually workflow rather than shape: both formats can follow a custom contour, but only a roll must match dispenser or applicator requirements.
The important distinction between die cut roll labels and individually cut stickers is how they arrive and how they move through production. A roll keeps labels on a continuous liner for efficient peeling, dispensing, storage, and application. An individually cut sticker arrives as its own separate piece, usually with a backing cut around or near the artwork. That difference affects labor, equipment compatibility, packing, and the experience of the person handling each piece.
The quick packaging decision
| Packaging situation | Better starting format | Why |
|---|---|---|
| Hundreds or thousands of similar jars, bottles, boxes, or pouches | Die-cut roll labels | The continuous liner supports repeat application and organized storage. |
| Automatic or semi-automatic label applicator | Die-cut roll labels | The roll can be configured for the equipment’s feed path and sensing system. |
| Small batch applied by hand | Either | Rolls can be convenient, but separate stickers may be simpler when volume is low. |
| Promotional sticker placed inside each shipment | Individually cut stickers | Each sticker is already a separate item that can be packed or handed out. |
| Sticker sold as merchandise | Individually cut stickers | The backing and individual presentation are part of the product. |
| Several designs needed on one compact carrier | Sticker sheet or label sheet | A sheet can keep multiple designs together without requiring several rolls. |
For primary product branding, roll labels are generally the stronger starting point. For a logo sticker included as a free extra, an individually cut format is usually easier to count and pack. A business can reasonably use both: a roll label on the package and an individual sticker inside it.
What are die cut roll labels?
A die-cut roll label is an adhesive label whose face material is cut to a finished shape while the surrounding waste is removed and the release liner continues through the roll. The label may be a standard rectangle, circle, or oval, or it may follow a custom contour. “Die cut” describes the cutting result; “roll” describes the supplied format.
The continuous liner is what makes the format useful in a packaging workflow. A worker can peel labels sequentially, a tabletop dispenser can present the next label, or compatible application equipment can advance the web from one label to the next. Die-cut media may be detected through gaps or registration marks, but the supported sensing method depends on the device. Zebra, for example, documents gap/web and black-mark sensing as distinct media-detection arrangements. Zebra’s label-design documentation explains these sensing considerations in the context of printer use.
An individually cut sticker is separated into its own physical piece after printing and finishing. It may be cut through both the printed material and backing, or it may have a peelable face cut within a larger individual backing. If that distinction matters for peeling or presentation, ask whether the product is cut through, kiss cut on an individual liner, or supplied on a sheet. For a broader explanation of these cutting formats, see die cut, kiss cut, and sticker sheet differences.
When die cut roll labels are better for packaging
Rolls earn their place when the same action must be repeated efficiently. Consider a candle maker labeling 500 jars. Reaching for a loose sticker, finding its peel edge, discarding the backing, and repeating the process can add unnecessary handling. A roll keeps the labels in sequence and makes it easier to establish a consistent application station.
A roll is particularly useful when:
- The same label design is applied across a production batch.
- Operators need labels in a predictable sequence.
- A dispenser or label applicator will be used.
- Loose pieces would be awkward to count, sort, or store.
- The packaging line needs variable information printed onto compatible blank or preprinted labels.
- Several rolls can be assigned to different SKUs without mixing individual pieces.
Rolls are not automatically the economical choice for every order. Setup, quantity, material, shape, and equipment specifications all affect the decision. For a test batch of a few boxes assembled at a desk, the handling advantage may be minor. For recurring production, the saved motion and cleaner organization become more valuable.
When individually cut stickers are better
Individually cut stickers are better when the sticker itself must behave like a separate item. They are convenient for event giveaways, retail packs, shipment inserts, samples, and branded extras. A customer can receive one without carrying away a strip of liner or peeling it from a production roll.
They can also make sense for irregular manual work. A repair company applying one service sticker at each visit may prefer separate pieces that fit into a technician’s kit. A small shop testing several packaging concepts may find loose stickers easier to divide among prototypes. Buyers looking for this presentation format can explore individually cut custom stickers, while keeping the package label and promotional sticker as separate specifications.
The main drawback is handling at scale. Loose pieces can require more sorting, counting, and backing disposal. They also cannot simply be loaded into equipment designed to unwind and sense a continuous label web.
Choose the finished label size and shape first
Start with the physical package, not the artwork canvas. Measure the usable application area on the actual jar, bottle, pouch, or box. Note seams, shoulders, ridges, corners, closures, and sharply curved areas. A design that fits inside a flat digital template may wrinkle or lift if it crosses a compound curve.
For cylindrical containers, test a plain-paper mockup at the intended size. Wrap or tape it in position and check whether important text disappears around the side. For tapered containers, a simple rectangle may skew or wrinkle because the top and bottom circumferences differ. The appropriate shape may require a purpose-built template rather than a decorative contour drawn by eye.
Custom shapes should support application as well as branding. Deep inward notches, delicate projections, and extremely narrow sections can be harder to peel and align. If speed matters, a slightly simplified contour may perform better than an intricate silhouette. Keep the legal copy, product name, net contents, barcode, and other essential elements comfortably inside the cut edge.
Specify the roll for hand or machine application
For hand application, the printer may only need a practical roll size and a sensible label orientation. Machine application is less forgiving. Obtain the applicator or printer specification before ordering labels, and send it to the label supplier rather than relying on a generic “standard roll.”
Roll direction, core, and outer diameter
Roll direction describes which edge of the label leads as the roll unwinds and whether the labels face inward or outward. This can determine whether a machine presents the label in the correct orientation. Core diameter affects whether the roll fits the spindle, while maximum outer diameter affects whether the loaded roll fits inside or around the equipment.
These dimensions are device-specific. Zebra’s published media specifications illustrate that supported media widths, roll dimensions, thicknesses, and related limits belong to a particular printer series rather than to all label equipment. Check the manual for the exact printer, dispenser, rewinder, or applicator being used.
Gaps, marks, and sensing
The space between labels gives some equipment a repeatable point for detecting the next label. Other systems use a black mark or another registration method. The shape itself can influence how consistently a sensor sees the gap, particularly when an irregular contour leaves different amounts of liner across the web.
Before production, confirm the required gap, sensing method, web width, number of labels across, winding orientation, and splice rules with both the printer and equipment documentation. A roll that looks correct can still be unusable if its core does not fit, the roll is too large, or the sensor cannot identify the next label.
Prepare artwork for a custom contour
Build the file at the intended finished size and clearly identify the cut path. Printers often request a vector contour on a dedicated layer or with a specific spot-color name, but naming and file-format rules vary. Follow the selected supplier’s artwork template instead of assuming one universal setup.
Artwork that reaches the edge should extend beyond the cut path as bleed. This prevents a pale sliver of unprinted material from appearing when normal cutting variation moves the edge slightly. Important text, borders, barcodes, and logos should remain inside the supplier’s safe area. Thin borders close to a custom edge are risky because even a small shift can make one side look heavier than the other.
Check raster images at final physical size, not merely at the size shown on screen. Enlarging a small logo reduces its effective resolution and can soften text or edges. Vector artwork is useful for logos, type, and cut paths because it can scale without the same pixelation. The complete workflow is covered in preparing artwork for custom sticker printing, but the label supplier’s current production template should control the final file.
Plan barcodes and QR codes as functional print elements
Do not squeeze a barcode into whatever space remains after the decorative design is finished. Its size, contrast, surrounding clear area, orientation, placement, and print quality affect whether it can be read. Curved packaging adds another variable: a code wrapped too far around a narrow container may not present enough of the symbol to the scanner at once.
GS1 US advises considering barcode size and placement, print resolution, contrast, quiet zones, and verification. It also cautions against red or reddish bars because some red-light scanners may not detect them reliably. Review GS1 US barcode placement and printing guidance before finalizing a retail UPC. ISO/IEC 15416:2025 defines a print-quality test methodology for linear barcode symbols, which is relevant when formal verification is required.
Print the code at intended size during proofing, place it on a real package, and test it in the conditions where it will be used. A successful phone scan of a QR code is useful but does not replace any verification required by a retailer, distributor, or standards program. Variable-data workflows should also be tested for code generation, sequence accuracy, and legibility before the full run.
Confirm material, finish, and adhesive requirements
Format alone does not make a label suitable for its environment. Tell the supplier what the label will be applied to, how the package is stored, and what it may encounter. A smooth paper carton in a dry stockroom presents a different problem from a refrigerated bottle that develops condensation.
- Surface: glass, rigid plastic, flexible film, coated paperboard, metal, or another substrate.
- Shape: flat, cylindrical, tapered, textured, flexible, or tightly curved.
- Application conditions: clean and dry, cold, damp, dusty, or manually handled.
- Service environment: refrigeration, moisture, oils, abrasion, sunlight, or repeated handling.
- Adhesive behavior: permanent, removable, repositionable, or another application-specific requirement.
- Face material and opacity: paper or film, clear or opaque, with any need to block the package color beneath it.
- Finish: uncoated, matte, gloss, laminate, or another available protection or appearance option.
- Printing after delivery: compatibility with any thermal-transfer, direct-thermal, inkjet, or other variable-printing process.
Ask for a material sample when adhesion or appearance is uncertain, then apply it to the real package under realistic conditions. Clear films, metallic surfaces, and transparent containers can alter perceived color and contrast. A white ink layer or opaque material may be needed when the package must not show through, but availability and artwork requirements must be confirmed with the supplier.
Food packaging needs an additional compliance check
A print-ready file is not necessarily a compliant food label. In the United States, manufacturers are responsible for ensuring that labels for FDA-regulated foods meet the applicable legal requirements. The FDA states that food labeling must be truthful and not misleading, while specific requirements vary with the product and the claims being made. Review the relevant FDA guidance and obtain appropriate regulatory help before printing a production quantity if the package contains food.
Die-cut roll label order checklist
- Measure the actual package and identify its usable label area.
- Choose whether the label needs a standard shape or a custom contour.
- Decide whether labels will be applied by hand, with a dispenser, or by machine.
- For equipment use, provide winding direction, core size, maximum roll diameter, web width, gap, and sensing requirements.
- Build artwork at finished size with the required cut path, bleed, and safe area.
- Check small text, fine lines, contrast, and thin borders at printed scale.
- Confirm the surface, storage conditions, exposure, face material, finish, and adhesive behavior.
- Plan barcodes and QR codes early; preserve required clear areas and arrange appropriate testing or verification.
- Request and inspect a proof, paying attention to shape, orientation, variable information, and code placement.
- Test a physical sample on the real container when fit, adhesion, color, or equipment compatibility is uncertain.
Choose according to the handling workflow
For repeated product packaging, die-cut labels on rolls are usually the practical choice because the continuous liner supports organized, sequential application. Individually cut stickers are usually better when each piece must be distributed, sold, or packed as a separate item. Shape alone should not decide between them.
Before ordering, map what happens from the moment the labels arrive to the moment the finished package leaves the workspace. If a machine touches the roll, start with its media specification. If people apply every label by hand, compare how quickly each format peels, aligns, and stores. Then verify the contour, artwork, material, adhesive, and barcode performance on the real package rather than approving the design only on screen.
References
- Label Design Considerations
- Media Specifications
- Barcode Placement & Printing Guidelines | GS1 US
- ISO/IEC 15416:2025 – Automatic identification and data capture techniques — Bar code print quality test specification — Linear symbols
- How to Start a Food Business | FDA
- Guidance for Industry: Food Labeling Guide | FDA