TLDR
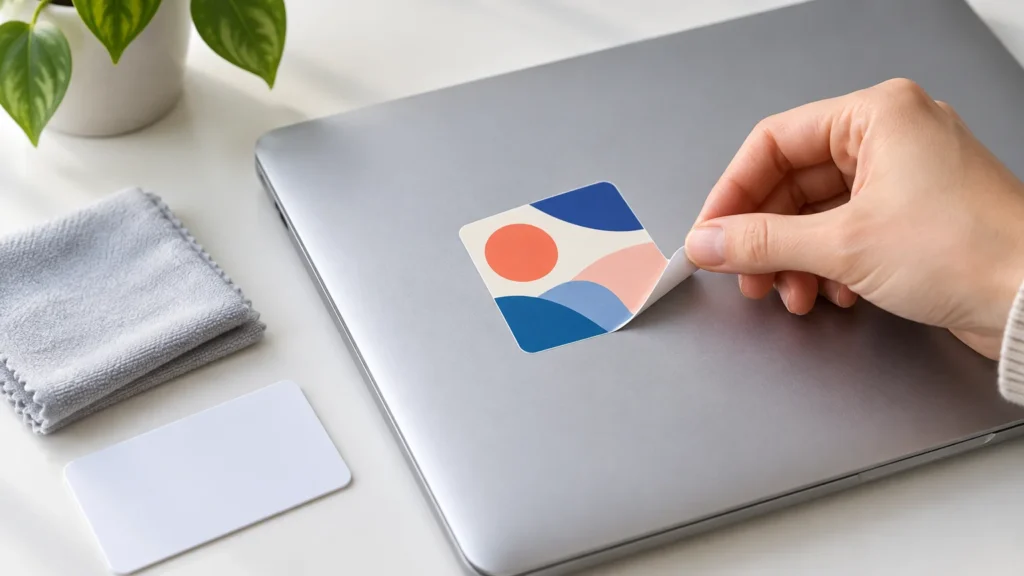
Shut down the laptop, unplug it, and place it on a clean surface. Lift one corner of the sticker with a fingernail, then peel slowly at a low angle. Roll small adhesive remnants away with a clean fingertip before trying any cleaner. If residue remains, consult the care instructions for your exact laptop model. Use a lightly dampened microfiber cloth or swab only when the manufacturer permits it, and never spray liquid directly onto the computer.
The safest answer to how to remove stickers from laptop surfaces is to begin with mechanical removal, not heat or solvent. A slow peel gives the adhesive time to release and reduces the chance of scratching the finish. Cleaning products should be a conditional final step because laptop materials and coatings vary considerably.
Before removing the sticker
Turn the laptop off completely and disconnect its charger, docks, drives, and other accessories. ASUS specifically advises shutting down a laptop and disconnecting AC power before cleaning it. ASUS laptop-cleaning guidance also says to put cleaner on a cloth instead of spraying it directly onto the computer.
Work on a clean, stable surface with enough light to see the sticker edge and any remaining glue. Microsoft likewise calls for a clean, debris-free work surface in its Surface service instructions. A grain of dirt caught under a cloth can be more damaging than the adhesive you are trying to remove.
Identify the surface before continuing. A smooth metal or hard-plastic lid generally presents a simpler job than a display, keyboard, vented base, textured coating, or rubberized palm rest. If the sticker crosses a seam or sits next to a port, orient the laptop so loosened debris and cleaning liquid cannot enter the opening.
| Sticker location | Recommended approach | Main concern |
|---|---|---|
| Smooth exterior lid or hard-plastic base | Slow peel followed by dry residue removal | Scratching or changing the finish with an incompatible cleaner |
| Palm rest | Use minimal pressure and verify the surface-care instructions | Wear-sensitive coatings and nearby keyboard openings |
| Textured or rubberized finish | Stop if the coating stretches, lifts, or becomes tacky | Adhesive may grip the texture or interact with the finish |
| Display or display bezel | Follow the exact model’s display-care instructions | Delicate coatings, edge seals, pressure, and liquid intrusion |
| Ports, vents, keys, and seams | Avoid liquid and do not push residue into the opening | Contamination inside the device |
How to remove stickers from laptop lids, bases, and palm rests
1. Lift an edge with your fingernail
Choose an intact corner and work a clean fingernail underneath it. Avoid metal blades, screwdrivers, razor blades, and other hard tools. Even if a metal tool removes the sticker quickly, one slip can leave a permanent line in painted metal or molded plastic.
Using a fingernail is also consistent with 3M’s instructions for removing its adhesive privacy-filter attachments from laptops: lift an edge with a fingernail and peel the attachment away. A decorative sticker is not necessarily made with the same adhesive, but the gentle mechanical principle is useful.
2. Peel slowly at a low angle
Pull the sticker back over itself rather than lifting it straight upward. Move slowly and pause if the sticker starts tearing or the laptop’s finish appears to move with it. Work from another corner when necessary instead of digging aggressively at one spot.
A paper sticker may separate into layers, leaving paper fibers and adhesive behind. In that case, remove only what releases easily. Do not scrape repeatedly in an attempt to complete the job in one pass.
3. Check whether the remaining mark is adhesive
Fresh adhesive usually feels tacky or catches a fingertip. A smooth outline that does not feel sticky may be a visual difference rather than glue. The covered area may simply be cleaner or less exposed to wear and light than the surrounding surface.
That distinction matters because solvent cannot correct fading, wear, or a difference in the finish. Continuing to rub a non-sticky outline may polish or discolor the surrounding area and make the contrast more obvious.
How to remove leftover sticker residue
Start with dry lifting or rolling
Use a clean fingertip to roll small pieces of adhesive into themselves. Work gently and lift the resulting ball away instead of smearing it over a wider area. 3M describes rolling remaining adhesive with a finger when removing its laptop privacy-filter attachments.
You can also touch the clean adhesive side of the removed sticker to a small remnant and lift it away, provided the old sticker is not carrying grit. Stop if this spreads the glue or requires substantial pressure.
Use a compatible cleaner only when needed
Check the support page or manual for the exact laptop model before applying a cleaner. Manufacturer guidance is not interchangeable. ASUS currently permits 70–75% isopropyl alcohol on certain listed exterior components when it is applied with a soft microfiber cloth, but some notebook manuals caution against alcohol and strong solvents. The model-specific instructions should control your decision.
Microsoft provides another example of why context matters. Its Surface foot-replacement instructions use a swab lightly dampened with 70% isopropyl alcohol to remove adhesive inside designated foot recesses, followed by drying. That narrow service procedure does not establish that alcohol is safe for every Surface area, laptop coating, or display.
If your manufacturer approves a cleaner for the affected exterior surface, apply a small amount to a microfiber cloth or swab—not to the laptop. The applicator should be lightly damp, not dripping. Wipe only the residue, keep liquid away from openings, and dry the area as directed. ASUS advises avoiding liquid left on the device and allowing the laptop to dry after cleaning.
Products and methods to avoid by default
Do not assume that a household product is safe merely because it dissolves adhesive. Acetone and acetone-based nail-polish remover, citrus or oil-based adhesive removers, aerosol solvents, abrasive pads, and concentrated cleaners can interact with paint, plastic, rubberized coatings, printed markings, or adhesives elsewhere in the device. Use one only if the laptop manufacturer expressly approves that product for the exact surface.
High heat is also a poor default around a laptop. It is difficult to control across thin panels, displays, batteries, keys, and bonded components. Likewise, soaking a sticker to soften it creates an unnecessary liquid-intrusion risk. The conservative sequence is slow peeling, dry rolling, and then a manufacturer-compatible cleaner applied sparingly to a cloth.
When to stop and consult the manufacturer
- The laptop has a soft-touch, rubberized, leather-like, nano-textured, or otherwise unfamiliar finish.
- The sticker is attached to the display, over a touchscreen coating, or along the display edge.
- The surface color appears on the back of the sticker as it lifts.
- The finish becomes tacky, glossy, cloudy, stretched, or discolored.
- The sticker covers or sits beside a port, vent, key, speaker opening, seam, or service access point.
- The label contains a serial number, regulatory information, service identifier, or other factory information you may need later.
- The manufacturer’s current care instructions conflict with generic cleaning advice.
Frequently asked questions
Can I use rubbing alcohol on sticker residue?
Sometimes, but not as a universal laptop-cleaning rule. Some manufacturers permit a specified isopropyl alcohol concentration on particular exterior components, while other manuals warn against alcohol or solvents. Check the instructions for your exact model and surface before proceeding. If it is approved, apply it sparingly to a cloth or swab rather than directly to the device.
How should I remove a sticker from a laptop screen?
Do not transfer the lid-removal process directly to a display. Screens can have anti-glare, touch, nano-texture, or other coatings, and pressure at the panel or edge can create additional risk. Use the manufacturer’s instructions for that exact display. If no sticker-removal guidance is provided, contact support rather than experimenting with solvent, heat, or a scraper.
Why is there still a square after the adhesive is gone?
A non-sticky square or outline may be a sticker shadow. The covered surface may have avoided fingerprints, abrasion, cleaning, light exposure, or ordinary finish changes affecting the surrounding area. Gentle cleaning may address a difference caused by dirt, but there is no reliable cleaning method for reversing actual wear or fading.
Can I remove factory and specification stickers?
That depends on what the label does. A promotional specification sticker is different from a serial-number, service, regulatory, or tamper-related label. Before removing any factory label, photograph it and check the manufacturer’s support or warranty information for your model and region. There is no responsible blanket answer about warranty effects.
Will a plastic card help lift the edge?
A fingernail is the safer first choice because it gives immediate feedback and is less likely to gouge the surface. Even a plastic card can trap debris or leave a polished line on a delicate coating. If the sticker will not lift without a tool, pause and seek model-specific guidance rather than increasing force.
The safest removal sequence
Power down and unplug the laptop, work on a clean surface, lift the sticker with a fingernail, and peel it slowly. Roll away minor residue before considering liquid. If adhesive remains, verify the care instructions for the exact material and laptop model, then use only an approved cleaner on a lightly dampened cloth or swab. If the mark is smooth rather than sticky, accept that it may be a finish difference—not residue that needs stronger treatment.