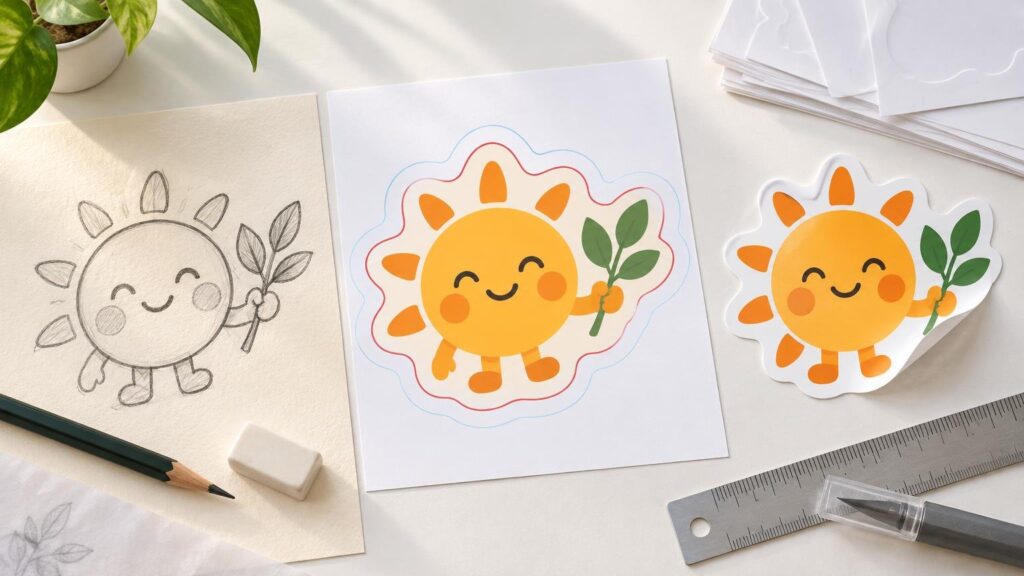
Drawing a sticker is partly an illustration job and partly a production job. The character, lettering, or logo must look appealing, but the artwork also needs a clear outer shape, enough resolution, and room for cutting variation. A strong design considers those physical requirements from the first sketch instead of treating them as last-minute export settings.
TLDR: Draw for the finished sticker
Start with the sticker’s final size and a simple, recognizable silhouette. Build the finished art as vector paths or a high-resolution raster image, then place a smooth closed cutline around it. Keep important details away from that line, add bleed when color reaches the edge, and inspect the file at actual print size before exporting. A complicated drawing can work; a complicated cutting path usually creates trouble.
1. Decide the size and outer shape first
Choose the approximate finished dimensions before adding detail. Artwork that looks spacious on a tablet may become cramped when reduced to a 2-inch sticker. Set the document to the intended physical size and check it at 100% view regularly. This exposes tiny lettering, narrow gaps, and delicate lines before they reach production.
Next, sketch the overall silhouette. Circles, rounded rectangles, arches, and broad character outlines are forgiving shapes. Long spikes, deep notches, and clusters of tiny protrusions make the sticker harder to cut and peel. Printing Ray’s file-preparation guidance recommends one clean, closed vector shape for a die-cut or kiss-cut line, with smooth curves rather than micro-inlets and tiny spikes.
2. Make the sketch readable at a glance
Block in the largest forms before drawing facial features, texture, or lettering. A sticker usually has to communicate from farther away than a sketchbook illustration. Strong contrast between the main subject and its background helps more than an abundance of fine detail.
If you begin on paper, scan or photograph the sketch evenly and import it into your drawing program. Lower its opacity and redraw on a separate layer. Treat the paper sketch as a guide rather than something that must be traced perfectly. Smoother contours and slightly larger gaps often reproduce better at sticker scale.
3. Choose vector or raster artwork
Vector art is especially useful for logos, lettering, flat-color graphics, and designs that may be resized. Adobe describes vector paths as segments connected by anchor points, with closed paths forming complete shapes. Illustrator’s shape, Pen, Pencil, and Curvature tools can create editable paths, while fill and stroke remain independently adjustable. Adobe’s guide to paths and shapes
Raster art is a natural choice for textured brushes, painted shading, and detailed illustration. It is made from pixels, so its usable size depends on resolution. Printing Ray recommends 300 DPI at final print size as a benchmark; a 3-by-3-inch sticker would therefore need at least 900 by 900 pixels.
| Artwork type | Best suited to | Main preparation concern |
|---|---|---|
| Vector | Logos, text, icons, flat graphics | Keep shapes and the cutline as clean, editable paths |
| Raster | Painted, textured, or photographic art | Create it at sufficient pixel dimensions for the final size |
| Hybrid | Vector lettering with painted illustration | Preserve resolution while keeping production paths separate |
Avoid enlarging a small web image and expecting it to become sharper. Redrawing the key forms as vectors or returning to a larger original file produces cleaner edges. For a more detailed export checklist, use the Artwork and File Prep Guide.
4. Build a smooth cutline
The cutline tells production equipment where the sticker should be cut. Create it as a separate closed shape around the artwork rather than using every small contour inside the drawing. Zoom out and inspect the silhouette: if it resembles a saw blade, simplify it.
An intentional border can make the cut shape clearer and give the artwork breathing room. Printing Ray recommends roughly 0.08 to 0.12 inch for a deliberate white border and warns that an extremely thin border can make normal cutting variation more noticeable. A narrow border may look centered on screen yet appear uneven once the physical piece shifts slightly during cutting.
5. Add bleed and protect important details
Bleed is extra artwork extending beyond the intended cut edge. It is useful when a background color, pattern, or illustration should run all the way to the edge. Printing Ray specifies 0.125 inch of bleed for edge-to-edge sticker artwork, while Adobe advises following the printer’s required bleed specification. Adobe’s bleed documentation
Bleed belongs outside the cutline; the safe area belongs inside it. Keep names, faces, thin outlines, and other essential details away from the edge. Printing Ray recommends keeping important content 0.125 inch inside the cutline for edge-to-edge designs. Extend background colors outward, but move critical content inward.
6. Clean the file before export
Hide the original sketch, remove stray marks, and check transparent areas. PNG and PSD support transparency, while JPG does not. For vector work, AI, PDF, EPS, and SVG preserve sharp paths; high-resolution PNG, PSD, TIFF, and JPG can suit raster illustration. Fonts should be converted to outlines in vector files or embedded in a PDF when outlining is unavailable, which reduces the risk of font substitution.
- View the design at its final physical size.
- Confirm that the cutline is one closed, smooth shape.
- Check that bleed reaches beyond every edge intended to print full bleed.
- Keep essential text and details inside the safe area.
- Remove hidden drafts, accidental dots, and unused cut paths.
- Export a copy while retaining an editable master file.
7. Prepare home-cut stickers carefully
For a home Print Then Cut workflow, export a clean full-color image with a transparent background where appropriate. Cricut Design Space accepts raster uploads such as JPG and PNG as well as SVG and DXF vector files. Its Print Then Cut workflow can save a full-color upload as a Flat Graphic and show a cut preview after background removal. Cricut’s image-upload instructions
Inspect that preview closely. Interior transparent gaps can be interpreted as additional cuts, while leftover background pixels can create bumps in the contour. Keep the first test sheet inexpensive and confirm that the print scale, border, and cut position work together. The home sticker printing guide covers printer, paper, settings, and cutting choices in more detail.
8. Review the proof as a production map
A digital proof is useful for checking finished size, artwork placement, cut shape, border intent, safe areas, and bleed. It should not be treated as a perfect prediction of printed color. Printing Ray notes that tiny text, uncertain sizing, missing bleed, complex cuts, and ambiguous cut paths are reasons a project may need closer proof review.
Check the proof at both enlarged view and actual size. Enlarged view reveals rough paths and stray pixels; actual-size view tells you whether the lettering and details remain legible. Approve the file only when the cutline describes the shape you actually want, not merely the shape the software generated.
Use artwork you have permission to print
Original drawings are the simplest option. If a design contains another artist’s illustration, character, logo, or modified artwork, confirm that you have permission to reproduce it. The U.S. Copyright Office explains that visual artwork can receive copyright protection once fixed in a tangible form and that uses such as copying or preparing derivative works generally require the copyright owner’s permission. U.S. Copyright Office guidance on visual art
The final drawing should survive the cut
The best sticker artwork balances personality with a practical outline. Draw bold main forms, simplify fragile contours, work at the intended size, and separate the illustration from its production cutline. Then verify resolution, safe space, bleed, transparency, and export settings before ordering.
If you want a commercial source for custom stickers, vinyl materials, labels, and related artwork preparation, view options. The important step comes first: supply a clean file whose size, edge, and cut shape are deliberate.