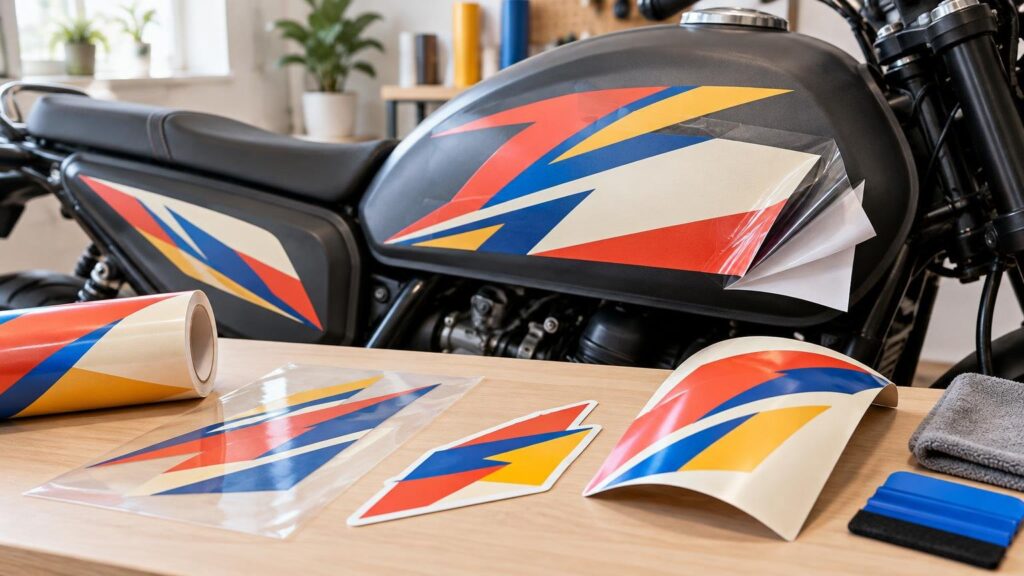
The best motorcycle sticker is not simply the one labeled “vinyl.” A reliable decal combines a suitable face film, adhesive, print process, protective layer, cut shape, and installation method. The motorcycle adds another complication: a graphic that lies neatly on a flat side case may lift or wrinkle when the same construction is stretched across a tank recess or compound-curved fairing.
TLDR
- Use a suitably rated printed vinyl sticker for small graphics on flat or gently curved, compatible surfaces.
- Investigate a complete cast vehicle-film system for compound curves, recesses, channels, and wrap-style coverage.
- Choose cut transfer vinyl for simple lettering and numbers; choose printed contour-cut vinyl for gradients, illustrations, textures, and multicolor designs.
- Confirm the exact adhesive, substrate compatibility, protective laminate, intended exposure, and removal expectations before ordering.
- Prepare artwork at final size, inspect fine details closely, and treat the proof as a production preview rather than a guaranteed color match.
Let the motorcycle panel choose the material
Begin by identifying exactly where the decal will sit. A windshield, painted side case, smooth fairing, textured trim panel, and deeply curved fuel tank are different applications. Record the surface material, finish, curvature, seams, edges, and approximate installed dimensions before selecting a product.
For a small emblem on a flat or gently curved panel, a suitably rated calendered or cast product may work. Compound curves, convex shapes, concave areas, channels, and wrap-style coverage make conformability much more important. Avery Dennison’s vehicle-wrap film guidance explains that calendered films can shrink, tent, or lift when stretched over demanding geometry and identifies cast film as the more appropriate option for complex curves.
That does not mean every motorcycle decal must use cast film. It means material should follow geometry. Paying for a conformable wrap system may be unnecessary for a small flat sticker, while choosing a basic sticker solely because it says “outdoor vinyl” can be a false economy on a sharply curved fairing.
| Motorcycle application | Construction to investigate | Main production concern |
|---|---|---|
| Small graphic on a smooth, nearly flat panel | Suitably rated printed vinyl with a compatible protective layer | Adhesion, clean edges, and exposure |
| Simple name, number, or one-color mark | Cut transfer vinyl | Stroke thickness, weeding, spacing, and installation |
| Multicolor logo or illustration | Printed contour-cut vinyl | Print quality, laminate compatibility, and cutline placement |
| Tank, fairing, recess, or compound curve | Complete cast vehicle-film system | Conformability, edge lift, installation method, and post-heating requirements |
| Textured or flexible trim | Product specifically approved for that substrate | Adhesive compatibility; ordinary vehicle film may not bond reliably |
Choose between transfer decals and printed stickers
Cut transfer decals are useful for solid-color lettering, racing numbers, stripes, and simple logos. The unwanted vinyl is removed, or weeded, and transfer tape holds the remaining pieces in position during installation. Very thin strokes, tiny letter counters, and tightly spaced details can become difficult to cut, weed, align, and apply.
Printed contour-cut vinyl is the practical choice for photographs, gradients, shadows, textures, and multicolor illustration. The design is printed as one graphic and cut around an outer contour. A simple silhouette is generally easier to produce and install than a perimeter filled with narrow spikes and deep notches. The guide to die-cut stickers explains how artwork contours become physical cut paths.
Evaluate the complete vinyl system
“Vinyl” names only part of the construction. Ask what the face film is, how the adhesive behaves, which surfaces are approved, whether the print receives a laminate or other protective layer, and whether those components are designed to work together. Also confirm the intended display period and expected removal behavior rather than assuming every permanent adhesive will behave identically.
Printed media must be adequately dried or cured before lamination. Laminating too early can contribute to adhesion problems or separation, according to Avery Dennison’s guidance. The laminate also needs to match the film, ink or printing process, contour demands, and exposure.
For a small printed graphic rather than a complex wrap, CustomStickers custom vinyl stickers and artwork-preparation options provide a relevant ordering path. Check the selected product against the motorcycle’s exact panel shape and substrate instead of treating a general outdoor rating as automatic approval for every location.
Check the surface before trusting the adhesive
Adhesion depends on more than wiping away visible dust. Wax, oily cleaners, lotions, trapped moisture, ceramic coatings, damaged paint, fresh paint, textured plastic, and flexible trim can all change the result. In its vehicle-graphics application guidance, 3M says the referenced film is not warranted on textured plastic and notes that its recommended adhesive does not adhere to rubber, silicone, or flexible plastics. Those are product-specific cautions, but they demonstrate why the exact motorcycle substrate must be checked.
Clean the surface according to the film manufacturer’s instructions, avoid cleaners that leave wax or oil behind, and allow the panel to dry completely. Installation temperature also comes from the applicable product bulletin. Although 3M provides a general 60–90°F (16–32°C) air-and-surface range in its vehicle guidance, it directs installers to the specific product documentation for the actual substrate, temperature, and service conditions.
Recesses, body lines, seams, sharp edges, and panel transitions may require specialized installation and post-heating. A large tank or fairing graphic is therefore closer to a wrap job than an ordinary peel-and-stick label. If the design crosses those features, consider professional installation and ask which film system the installer supports.
Prepare artwork for its final physical size
Use vector artwork for logos, lettering, numbers, and other hard-edged graphics whenever possible. AI, PDF, EPS, and SVG files can preserve clean paths as the design is resized. Raster images can work when they contain enough pixels; Printing Ray’s file-preparation guidance uses 300 DPI at final size as its target, meaning a 3-by-3-inch raster design should be about 900 by 900 pixels. Screenshots, small web images, and heavily compressed JPEGs often soften or pixelate when enlarged.
Inspect the design at its actual printed size. Pay special attention to small text, thin lines, narrow gaps, fragile protrusions, and panel interruptions. For full-bleed artwork, Printing Ray specifies extending the background 0.125 inch beyond the cut and keeping important content 0.125 inch inside it. Its guidance also recommends avoiding micro-inlets below 0.03 inch and notes that a 0.08–0.12-inch white border is more tolerant of normal cut variation.
A thin printed border can make minor cutting variation look dramatically uneven. Either make the border more forgiving or remove it. For a broader workflow, use the custom sticker artwork preparation guide before uploading the final file.
Review the proof as a production document
Check spelling, dimensions, orientation, cutline position, quantity, material, finish, and ordered specifications on the proof. If the graphic must align with a vent, seam, fastener, or adjacent decal, verify those relationships against measurements from the actual motorcycle.
Do not treat an on-screen proof as a perfect color contract. Displays vary, and RGB artwork may shift when converted for printing. Use CMYK where the printer requests it and supply Pantone references when brand-critical color matching is available. A digital proof primarily confirms layout and production setup.
Questions to ask before ordering
- Is the panel flat, gently curved, convex, concave, recessed, textured, or flexible?
- Is the product a general sticker, a cut transfer decal, or part of a cast vehicle-film system?
- What face film, adhesive, ink or print method, and protective layer are being used?
- Is the product approved for the exact painted, plastic, glass, or metal surface?
- Will the graphic cross an edge, seam, body line, fastener, or panel transition?
- Does the artwork have sufficient resolution, safe spacing, and a practical cut contour?
- What cleaning, application-temperature, pressure, and post-heating instructions apply?
- What are the expected display period and removal considerations for this specific product?
The practical buying verdict
For a small motorcycle logo on a smooth, compatible panel, prioritize a well-prepared file, a suitable outdoor printed film, compatible protection, and careful installation. For lettering and numbers, transfer vinyl can produce a clean painted-on appearance when the details are sturdy enough to weed and apply. For tanks, fairings, recesses, and compound curves, stop shopping by the word “vinyl” and start specifying a complete cast vehicle-graphics system. The shape and surface of the motorcycle—not the product name—should make the final decision.