TLDR
To get shower caddy stickers off, first determine whether they are stretch-release strips, reusable pressure-grip pads or ordinary adhesive mounting plates. Remove the caddy from its base when the design allows. For stretch-release strips, hold the mounting plate gently and pull the exposed tab slowly parallel to the wall—not outward. For pressure-grip pads, use the product’s release handle. Treat leftover residue as a separate problem, and test any surface-approved adhesive remover in a hidden spot before applying it broadly. Avoid blades, abrasive scrubbers and unverified solvents, especially on acrylic, fiberglass and coated metal.
The word “sticker” can be misleading here. What looks like a sticker behind a shower caddy may be a removable strip, a plastic mounting plate with adhesive, or a reusable pad that releases mechanically. Those systems require different techniques, so pulling harder is not a reliable removal strategy.
Identify the mounting system before pulling
Unload the caddy and inspect it from the side, underneath and above. Look for a brand name, release handle, removable shelf, plastic adapter plate or narrow adhesive tab extending below the hardware. If the original packaging or instructions are available, use them. Manufacturer directions matter because a stretch-release strip and a pressure-grip pad can look similar while attached but release in materially different ways.
| What you see | Likely system | Correct first move |
|---|---|---|
| A narrow tab extending below a plastic base | Stretch-release adhesive strip | Remove the caddy if possible, stabilize the base and pull the tab slowly along the wall |
| A release handle connected to broad reusable pads | Pressure-grip mounting system | Operate the release handle and guide the pads away with the caddy |
| A plastic plate with no visible tab or handle | Unknown adhesive mount | Find the model instructions before prying or treating it as a stretch strip |
| Hardware is already gone but tacky material remains | Adhesive residue | Stop pulling and switch to a surface-compatible residue-removal process |
Do not assume every exposed piece of plastic is a pull tab. A tabless foam pad or mounting plate may use conventional pressure-sensitive adhesive rather than a stretch-release mechanism. Pulling an unidentified mount outward can place unnecessary force on paint, coatings, grout edges or the shower surround.
Prepare the caddy and work area
Remove bottles, razors and other loose items so the caddy is light and easy to control. Examine how the basket or shelf connects to its mounting base. Some systems are designed so the accessory slides off while the adhesive-backed plate stays on the wall. Removing that weight gives you better access to the release strip and reduces leverage against the surface.
Keep one hand available to control the mounting plate, but do not press or pry aggressively. The goal is to release the adhesive using its intended motion, not to defeat it with force. If the caddy does not detach easily, pause and identify the model rather than twisting the basket.
How to remove stretch-release shower caddy strips
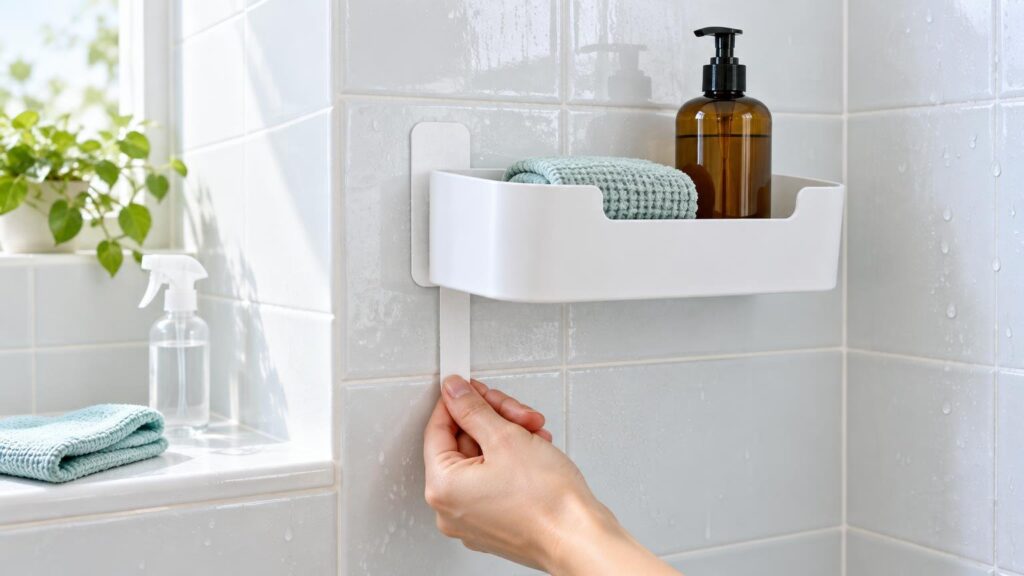
Command bath-organizer instructions direct the user to slide the organizer up and off its mounting base, hold the base lightly, and pull the adhesive strip straight down against the wall while stretching it slowly. The instructions warn that failing to follow the removal direction can cause damage.
- Slide or lift the caddy off the mounting base if the product is designed to separate.
- Hold the base lightly so it stays aligned, without pinning the adhesive strip in place.
- Grip the exposed release tab close to the wall.
- Pull slowly in the direction indicated by the product, keeping the strip parallel to the surface.
- Continue with steady movement as the strip lengthens and releases. Do not jerk it or peel it toward yourself.
The direction is the important part. 3M’s guidance for Command bath strips specifies pulling slowly and straight down toward the floor. That stretches the adhesive along the wall instead of concentrating force in an outward peel.
tesa Powerstrip bathroom accessories use the same broad principle but have their own hardware sequence: remove the accessory, hold the transparent adapter plate, and pull the Powerstrip slowly and parallel to the surface. tesa also cautions against applying pressure to the accessory during removal.
How to remove reusable pressure-grip pads
A pressure-grip caddy should not automatically be treated as a conventional adhesive-strip product. For example, OXO’s Press-Sure Corner Caddy uses reusable pressure-grip pads. Its instructions direct the user to pull the release handle and guide the pads away from the wall with the caddy. If a pad remains on the wall, it can be pulled off and reattached to the shelf.
If your caddy has a similar-looking handle, verify that it is actually the release control for that model. Use the handle through its intended range while supporting the caddy. Do not insert a screwdriver behind the pad or substitute an outward yank for the documented release motion.
What to do when there is no tab or release handle
An unidentified adhesive plate is where damage is most likely, because there is no reliable universal pulling direction. Look for molded lettering or a model number on the caddy and mounting plate. Search for the manufacturer’s removal instructions, not merely installation instructions for a visually similar product.
Do not assume that compatibility claims for one mounting system apply to another. Command lists surfaces such as ceramic tile, glass, mirror, metal, fiberglass, finished wood and painted surfaces for certain water-resistant bath products, but that does not establish that a different caddy’s adhesive is suitable for—or safely removable from—the same surfaces.
If the mounting hardware cannot be identified, use the care instructions for the shower surface as the limiting rule. A method that might release adhesive from bare glass can still cloud acrylic, mark a coating or damage a metal finish.
Remove leftover adhesive separately
Detaching the caddy and cleaning residue are two different jobs. A mounting system may release cleanly, or it may leave a thin film after the hardware is gone. Do not keep pulling at the surface simply because tackiness remains.
For general adhesive residue, 3M advises applying an appropriate adhesive remover according to that product’s directions, allowing time for it to penetrate, lifting softened material with a plastic applicator or brush, and collecting it with a cloth. It also advises testing the remover in an inconspicuous area and consulting the product’s safety information. This is general adhesive-removal guidance, not confirmation that any particular chemical is safe for every shower.
- Check the shower, tub, tile or door manufacturer’s care instructions before choosing a remover.
- Test the proposed product in a hidden area and inspect the finish after the specified contact period.
- Use only the amount and dwell time stated by the cleaner or remover manufacturer.
- Lift softened residue with a non-scratching plastic tool or other implement approved for the surface.
- Wipe away the loosened material rather than spreading it over a larger area.
- Repeat cautiously instead of escalating immediately to a stronger solvent or abrasive tool.
Adjust the method to the bathroom surface
Ceramic tile, glass and metal
These surfaces may appear durable, but the surrounding details can be more vulnerable than the main face. Avoid levering against grout lines, caulk, tile edges, coated glass or plated metal. Even when an adhesive system lists tile, glass or metal as compatible, follow that product’s release procedure rather than treating the compatibility list as permission to scrape.
Acrylic and fiberglass surrounds
Use particular caution on molded shower walls and tub surrounds. Delta advises against abrasive scrubbers, steel wool, sponges and several solvents on acrylic. Kohler likewise warns against abrasive cleaners and solvents on acrylic shower modules and identifies chemicals that can damage the finish.
That means a solvent-and-scraper technique borrowed from a glass surface should not be transferred casually to acrylic or fiberglass. Check the fixture manufacturer’s care sheet first, use a cleaner explicitly allowed for that material, and avoid increasing pressure when residue does not release immediately.
Shower doors and metal frames
Shower doors can combine glass, protective treatments, seals and finished metal in a small area. Sterling/Kohler warns that sharp instruments, abrasive materials and cleaners containing substances including abrasives, ammonia, bleach, acids, alcohol or solvents can damage shower-door glass or frame finishes.
Keep removal products from running into seals, tracks or adjacent finishes unless the door manufacturer permits their use. A cleaner considered acceptable for plain glass is not automatically appropriate for every coated door or metal frame.
Common mistakes that make removal harder
- Pulling a stretch-release tab outward instead of parallel to the wall.
- Trying to remove the loaded caddy and adhesive base as one piece.
- Treating every clear or foam pad as a stretch-release strip.
- Using a razor blade, screwdriver or metal putty knife to pry behind the mount.
- Starting with a strong solvent before checking the shower material’s care instructions.
- Scrubbing acrylic or fiberglass with an abrasive pad.
- Assuming that removing the mounting plate will also remove every trace of adhesive.
The safest sequence
Start with identification, not force. Empty the caddy, find its release mechanism, remove the accessory from its base when instructed, and use the exact release motion intended for that mounting system. Stretch-release strips generally come off by pulling slowly along the wall; reusable pressure pads may require a handle-assisted release. An unknown tabless plate deserves a model lookup before any prying begins.
Once the hardware is off, reassess the surface before treating residue. The right adhesive remover is one that both softens the remaining material and is approved for the specific tile, glass, acrylic, fiberglass or finish in front of you. A slow, surface-specific process is less dramatic than scraping, but it is far less likely to turn a removable shower caddy into a permanent repair job.
References
- BATH18-ES_34871776133
- gg_1323280_instructions
- Installation Guide Powerstrip Technology – tesa
- Command™ Removable Bath Adhesive Strips 17200-16-EU-VP, 8 Small + 4 Medium + 4 Large Strips, Value Pack | 3M Slovenija
- Command™ Bath Shower Caddy Hanger | 3M United States
- Removal
- How to Clean Your Acrylic Shower or Tub | Delta Faucet Blog
- Care and Cleaning Instructions
- How to Clean & Care for Bath & Shower Doors | Sterling Plumbing